Language
Follow-along guide
From Idea to Website:
Vibe Coding for Beginners
Set up OpenCode, Neuralwatt, GitHub, and Vercel before we start building. Bookmark this page for easy access.
Install OpenCode (desktop)
We use OpenCode — an open-source AI coding agent that works in the terminal, desktop app, and IDE extensions. For this workshop, install the desktop app (beta).
macOS
- Open opencode.ai/download
- Download the build for your chip (Apple Silicon or Intel)
- Open the installer and drag OpenCode into Applications
- On first launch, allow the app if macOS asks
Windows
- From the download page, get Windows (x64)
- Run the installer and finish setup
- Launch OpenCode from the Start menu
Linux
- Download .deb or .rpm from the download page
- Install with your package manager, then open OpenCode
Optional: OpenCode also ships as a terminal app curl -fsSL https://opencode.ai/install | bash. The desktop app is enough for today.
Get a Neuralwatt API key
Neuralwatt Cloud provides an OpenAI-compatible API for coding models. Registration is free — new accounts get $5 in trial credit, valid for 30 days.
Create your API key
- Go to portal.neuralwatt.com/auth/register and create your account
- Sign in to the portal and open Dashboard → API Keys
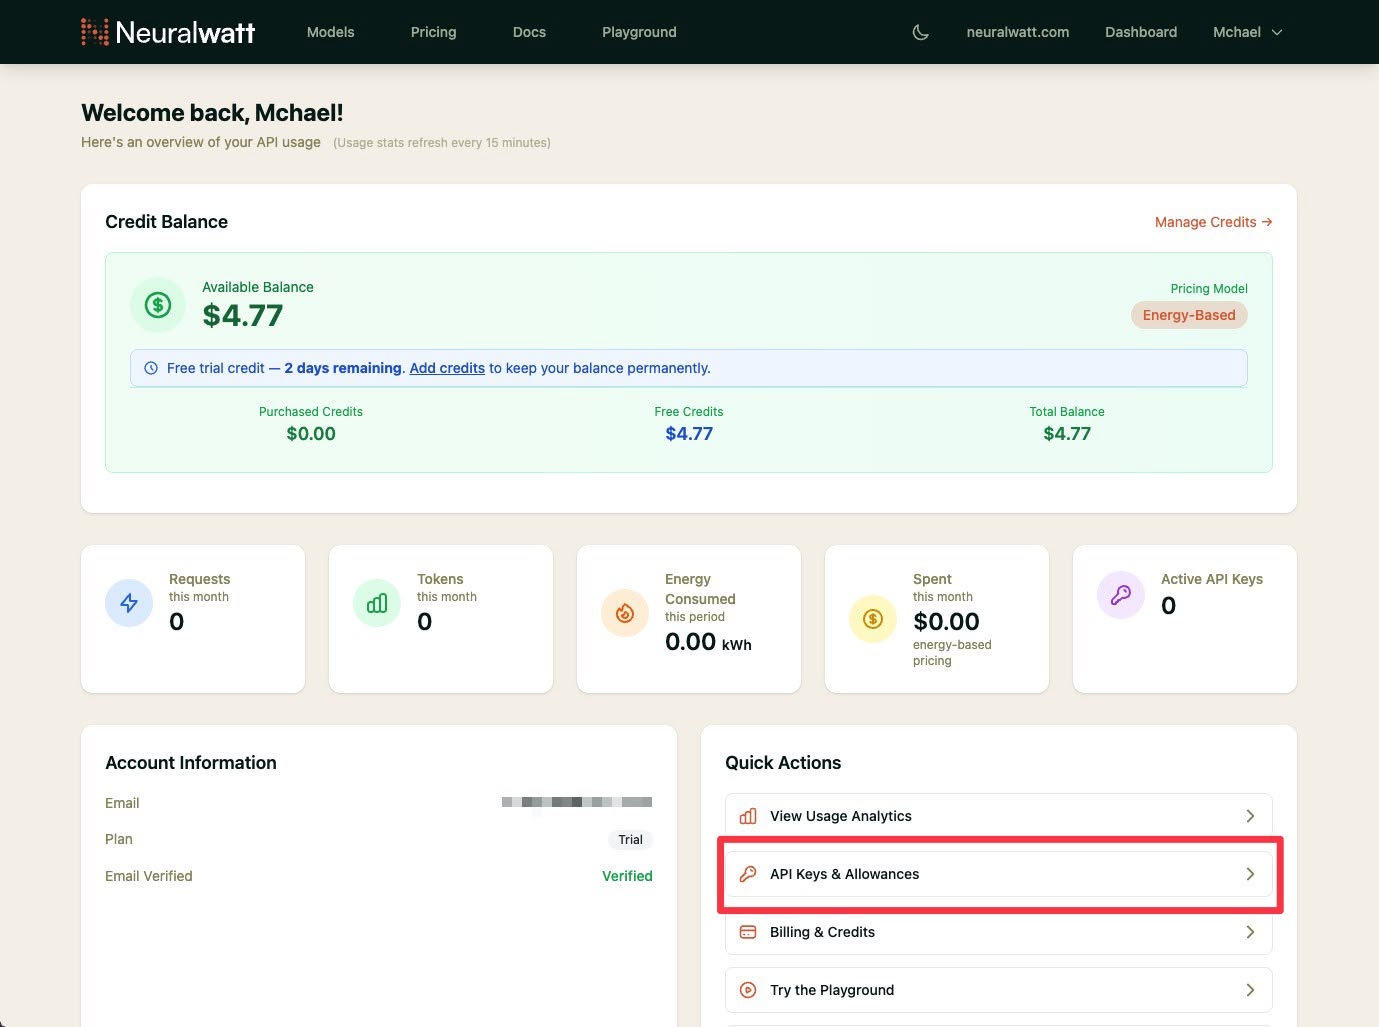
- Click Create Key, name it (e.g.
workshop)
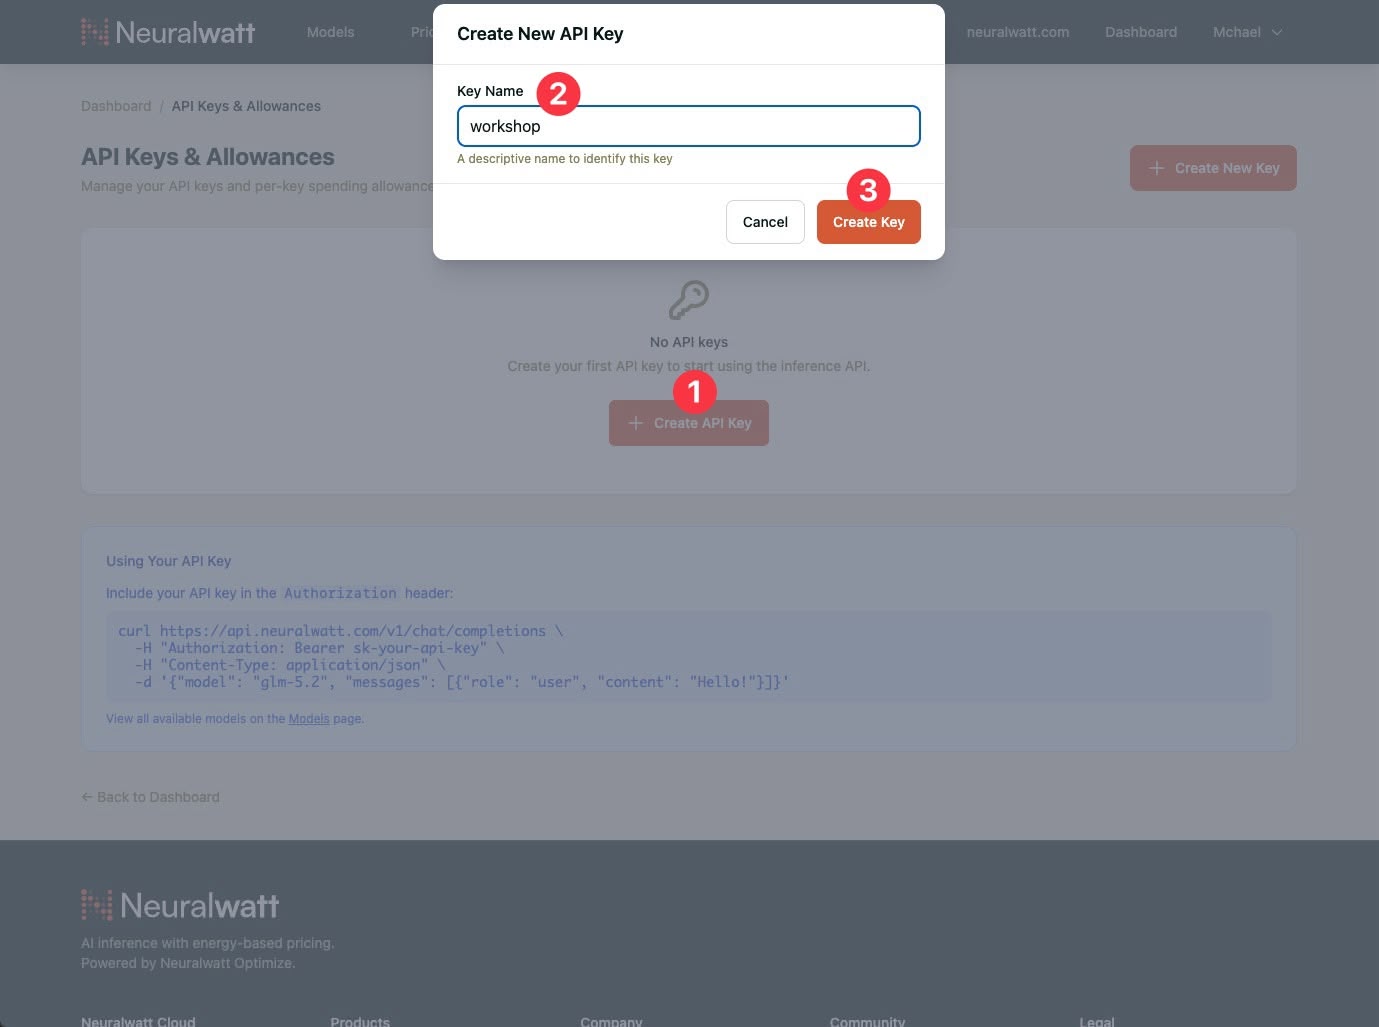
- Copy the API Key and store it somewhere safe

Trial credit for the workshop
Your $5 trial credit lasts 30 days from signup — enough for today’s exercises and follow-up practice. Neuralwatt uses energy-based pricing; check your usage in the portal dashboard if you want to see what’s left.
Keep your key private. Don’t paste it in chat, slides, or GitHub. Treat it like a password.
Connect OpenCode to Neuralwatt
After OpenCode is installed and you have your Neuralwatt API key, connect it in the desktop app — no config files or environment variables needed.
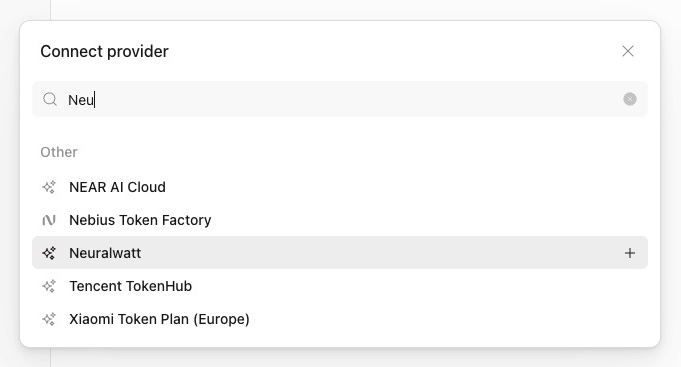
In OpenCode Desktop
- Open OpenCode and click the settings icon (gear) in the sidebar
- Under Server, click Providers
- Search for Neuralwatt and click the + next to it
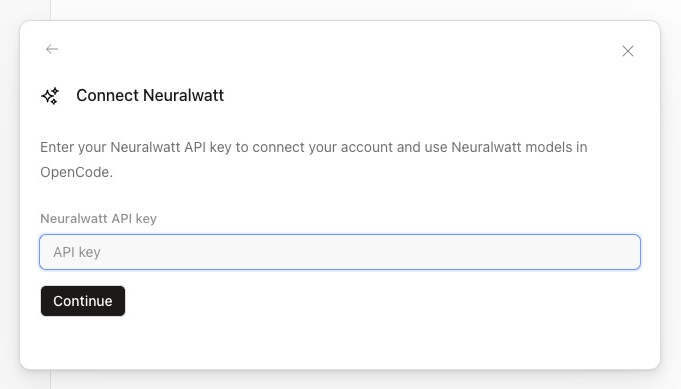
- Paste your API key and click Continue
- Click the model name below the chat box (next to Build), search under Neuralwatt, and select Kimi K2.6 — that’s the model we’ll use in today’s workshop
Use Kimi K2.6 for all exercises today so everyone follows the same setup. You can try other Neuralwatt models later from the model picker.
More detail: Neuralwatt × OpenCode guide and OpenCode providers docs.
Create a GitHub account
GitHub is where we’ll store the website you build today. A free account is all you need — we’ll push your project there during the workshop so you can keep it and share it.
Register
- Go to github.com/signup
- Enter your email, create a password, and choose a username (this becomes part of your public profile URL)
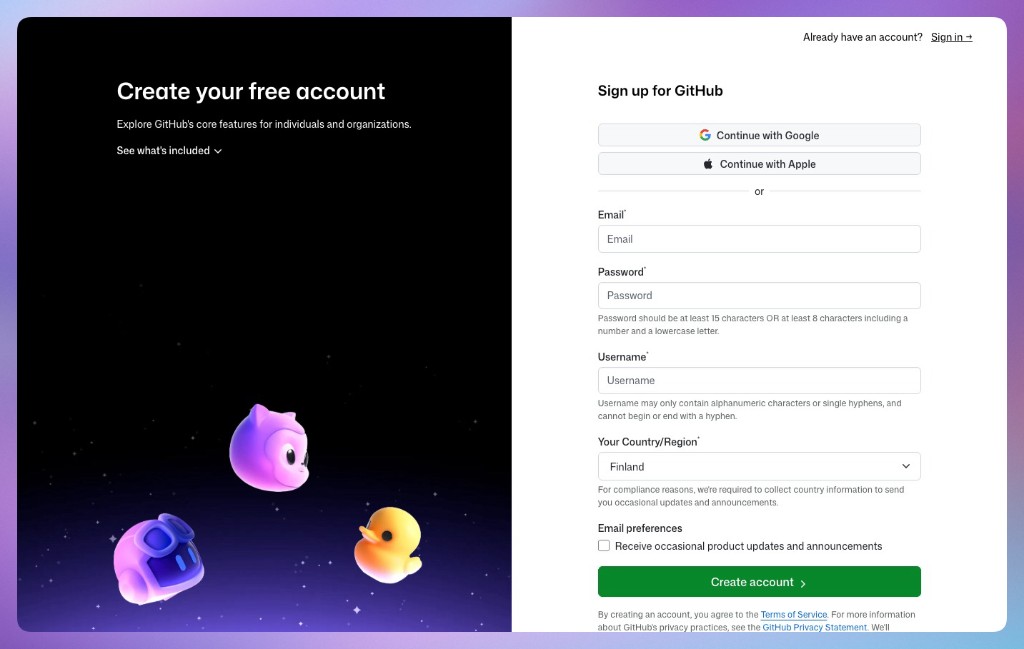
- Complete the verification puzzle or code GitHub sends to your email
- Answer the short setup questions (you can skip optional steps like choosing a plan — the Free tier is fine)
- Verify your email address if GitHub asks you to confirm from your inbox
Why we need GitHub today
Your finished project will live in a GitHub repository (a project folder in the cloud). That lets you save your work, open it on another computer, and deploy it to Vercel.
Already have an account? Sign in at github.com/login and make sure you know your username and password (or how you sign in with Google/Apple).
Create a Vercel account
Vercel publishes your site to the internet and gives you a shareable link (e.g. your-site.vercel.app).
The free Hobby plan is enough for today’s one-page site.
Register (recommended: use GitHub)
- Go to vercel.com/signup
- Click Continue with GitHub — this is the easiest path since you already created a GitHub account in section 4

- Authorize Vercel when GitHub asks (Vercel needs permission to read your repos and deploy from them)
- Finish Vercel’s short onboarding (team name can be your name; the free plan is selected by default)
- You should land on the Vercel Dashboard — you’re ready; we’ll deploy your site together during the workshop
What happens during the workshop
After you build your site with OpenCode, we’ll put it on GitHub and import that repo into Vercel. Vercel will build and host it — you’ll get a live URL to open on your phone and share with others.
Don’t paste secrets. Your Neuralwatt API key stays in OpenCode only — never commit API keys to GitHub or add them to your website files.
Writing prompts
The AI works best when you write like you’re briefing a helpful teammate: clear goal, enough context, and one request at a time.
What makes a good prompt
- Say what you want — e.g. “a one-page portfolio in
index.html” or “a restaurant site with menu and hours.” - Set constraints — “Use only HTML and CSS, no frameworks” or “one file only.”
- Give your real details — replace
[brackets]with your name, menu items, colors, or copy. - Ask for small steps — first draft, then content, then design, then mobile fixes.
- Share what you see — if something breaks, paste the error or describe what looks wrong on your screen.
Phrases you can reuse
- “Ask me questions before you write any code.”
- “Give me a plan first, then wait for my OK.”
- “Make the smallest change needed — don’t rewrite the whole page.”
- “Explain what you changed in simple terms.”
- “Here is the error. Diagnose before fixing.”
Weak: “Make my website better.”
Strong: “Improve the hero section in index.html: larger heading, more spacing, keep my existing text, mobile-friendly.”
Tip: For bigger features, switch to Plan mode (Tab key), review the plan, then switch back to Build mode and say “Go ahead.” You stay in control — read the answer, test in the browser, then send the next prompt.
Example prompts
Pick one track below. Copy each prompt into OpenCode in order.
Replace anything in [brackets] with your own details before sending.
Track A - Personal portfolio
Best for students, freelancers, and career shifters showcasing your work.
Step 1 — First draft
Create a single-page portfolio website in one file: index.html.

Use only HTML and CSS (no frameworks). Include these sections:
- Hero with my name [Your Name], a short tagline [e.g. "Aspiring web developer"], and a friendly photo placeholder
- About me (3–4 sentences using this info: [paste a short bio])
- Skills (6–8 skills as tags or a simple list: [e.g. communication, customer service, Canva])
- Projects (2–3 project cards with title, 1-sentence description, and a "View" link placeholder)
- Contact (email [your@email.com] and links to [LinkedIn / GitHub / optional])

Style: clean, modern, lots of white space, readable fonts, mobile-friendly. Use a calm color palette with one accent color.
Step 2 — Make it yours
Update index.html with my real content:
- Name: [Your Name]
- Tagline: [Your tagline]
- About: [Your bio paragraph]
- Skills: [list your skills]
- Projects: [Project 1 title + description], [Project 2 title + description]
- Contact email: [your@email.com]

Keep the same layout. Improve typography so headings stand out and body text is easy to read.
Step 3 — Polish the design
Improve the visual design of index.html without changing my text:
- Add subtle hover effects on buttons and project cards
- Use a consistent spacing system (padding/margins)
- Add a simple navigation bar at the top that links to each section (About, Skills, Projects, Contact)
- Make the hero section feel welcoming, not crowded

Show me what you changed in plain language.
Step 4 — Mobile check
Make index.html look great on phones:
- Stack sections vertically with comfortable padding
- Ensure text is at least 16px on mobile
- Make tap targets (links, buttons) easy to press
- Test that nothing overflows horizontally

Explain any CSS you added for mobile.
Step 5 — Fix & iterate (use anytime)
The [section name] section doesn't look right on my screen. [Describe what you see, e.g. "text is too small" or "cards overlap"].

Make the smallest change needed to fix it. Don't rewrite the whole page.
Track B - Business landing page
Best for small business owners who want customers to find hours, menu, and how to visit or order.
Not a restaurant? Keep the same steps — swap menu for services/products and hours for how customers reach you.
Step 1 — First draft
Create a one-page restaurant website in a single file: index.html.

Use only HTML and CSS (no frameworks). Restaurant details:
- Name: [Restaurant Name]
- Tagline: [e.g. "Fresh pasta & wood-fired pizza in downtown Cebu"]
- Cuisine: [e.g. Italian, Filipino, cafe]
- Address: [street, city]
- Phone: [phone number]
- Hours: [e.g. Mon–Sat 11am–9pm, Sun 12pm–8pm]

Include these sections:
1. Hero with restaurant name, tagline, and two buttons: "View Menu" and "Call / Reserve"
2. About (warm 2–3 sentences about the restaurant)
3. Menu highlights (4–6 popular dishes with short descriptions and prices in [currency])
4. Hours & location (address, hours, embedded-style map placeholder or "Get directions" link to Google Maps)
5. Contact & social (phone, email optional, Instagram/Facebook placeholders)

Style: appetizing and trustworthy — good food photography placeholders, clear typography, works on mobile.
Step 2 — Real menu & details
Update index.html with our actual information:

Restaurant: [Restaurant Name]
About: [2–3 sentences about your story, chef, or specialty]

Menu items (use these exactly):
1. [Dish] — [price] — [one-line description]
2. [Dish] — [price] — [description]
3. [Dish] — [price] — [description]
4. [Dish] — [price] — [description]
5. [Dish] — [price] — [description]
6. [Dish] — [price] — [description]

Hours: [your hours]
Address: [full address]
Phone: [phone]
Reservation note: [e.g. "Walk-ins welcome" or "Reserve by phone"]

Keep one page. Make prices easy to scan.
Step 3 — Help customers take action
Improve index.html so customers know what to do next:
- "View Menu" scrolls smoothly to the menu section
- "Call / Reserve" uses tel:[phone] so mobile users can tap to call
- Add a sticky or top navigation: Menu, Hours, Location, Contact
- Add a short line about [delivery / pickup / dine-in options if any]

Don't change our menu text. Focus on clarity and calls-to-action.
Step 4 — Look professional
Make the restaurant site feel more premium and local:
- Choose a color palette that fits [cuisine type] (warm for bakery, fresh greens for healthy, etc.)
- Use high-quality placeholder images for hero and 2–3 dishes (via placeholder URLs is fine)
- Add a simple footer with copyright, address, and hours repeat

Keep all content in one index.html file.
Step 5 — Fix & iterate (use anytime)
On mobile, [describe the problem — e.g. "the menu prices wrap badly" or "the Call button is hard to tap"].

Fix only that issue in index.html. Show me the exact CSS you changed.
Bonus prompts - Both tracks
Use anytime with either track.
Add a photo
Add an image to [section name]. I'll use this image URL: [paste link] or a placeholder. Keep it responsive and add alt text for accessibility.
Explain the code
Explain index.html in simple terms for a beginner. What does each major section do? What should I edit if I want to change my phone number or a menu price?
Safe small change
Change only the accent color to [color name or hex] and the main heading font style. Do not change layout or rewrite sections.
During the workshop
How we’ll work with AI
- Describe the goal clearly (what the page should do)
- Review what the AI suggests before accepting big changes
- Run or open the site in the browser often
- If something breaks, paste the error message back to the AI
- Iterate in small steps — you stay in charge
Useful OpenCode commands
- Settings → Providers — add or change your AI provider (e.g. Neuralwatt)
- Model picker (below the chat box) — should show Kimi K2.6 under Neuralwatt for today
- /init — help OpenCode understand your project (run once per folder)
- /undo — revert the last change
If something goes wrong
- Auth errors — open Settings → Providers → Neuralwatt and re-paste your API key
- Out of credit (Neuralwatt) — check your balance in the portal dashboard; trial credit lasts 30 days
- Model not found — click the model name below the chat box, search Kimi K2.6 under Neuralwatt, and select it from the list (don’t type model IDs by hand)
- Ask the facilitator — we’re here to help